Tools & Brushes
Tools
Tool - is an instrument for processing layer texture when the user paints on it. The asset has 9 built-in tools: brush, erase, bucket, eyedropper, brush sampler, clone, blur, gaussian blur, and grayscale tool. User can switch between tools to get different drawing results. Let’s look at tools functional:
-
Brush - default tool for painting. Tool parameters:
Can Paint Lines- whether to paint lines. If this flag is disabled, only dots will be used for painting;Draw On Brush Move Only- render brush only when a user moves the input source (mouse, finger, pen, etc.).Smoothing- smoothing parameter allows for the drawing of smooth lines for SpriteRenderer and RawImage components. The smoothing level can be adjusted on a scale from 1 to 10. A value of 1 deactivates smoothing, while a value of 10 provides the maximum line smoothness. When the smoothing value exceeds 1, the line drawing process involves rendering additional brush samples and painting lines may have 2 frames delay:
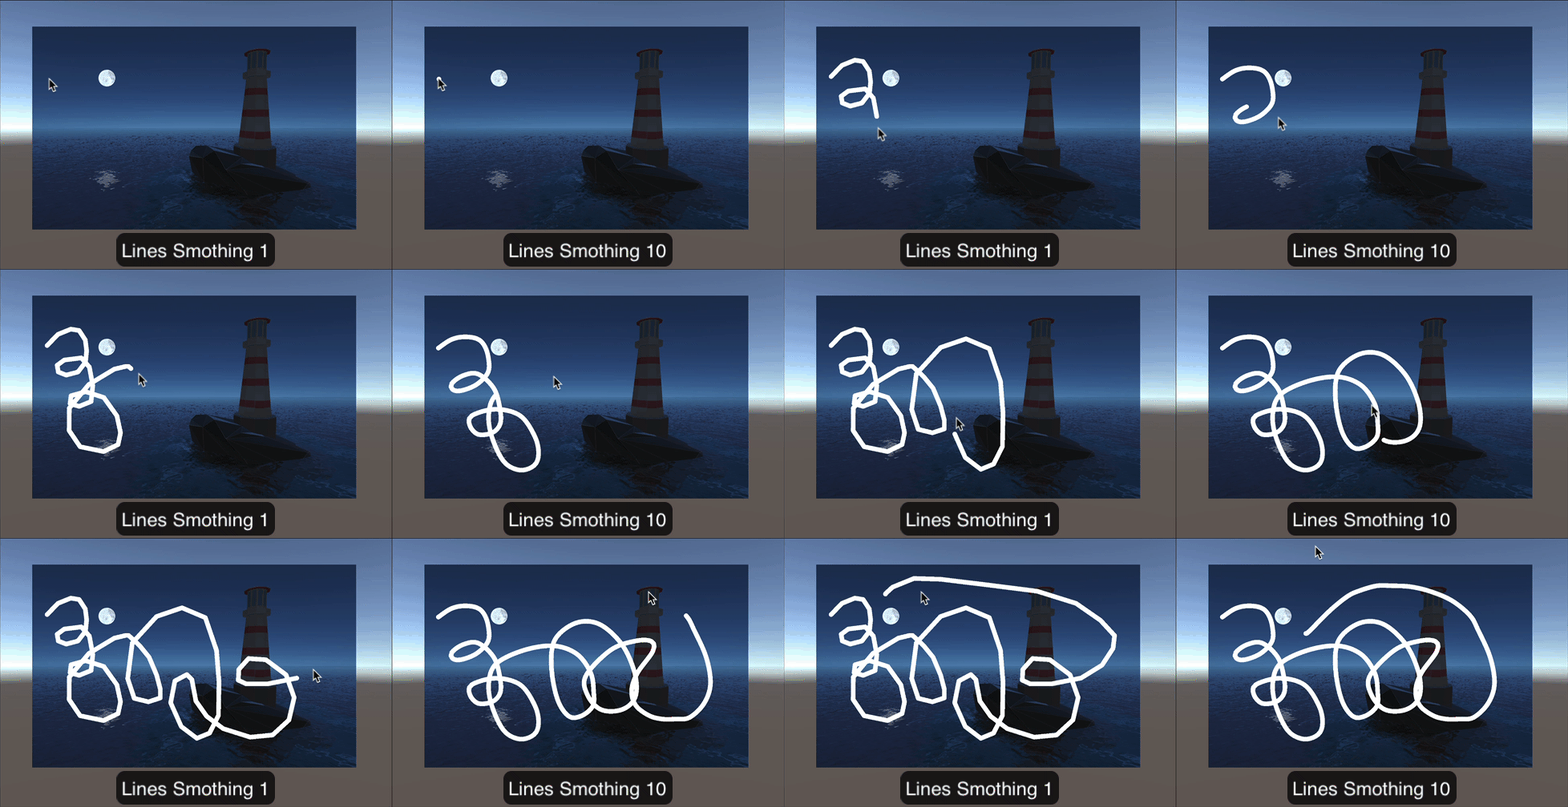
In this example, to demonstrate the differences between smoothing values, drawing is done at a target FPS value of 20 Randomize Points Quads Angle- randomizes each brush samples angle while drawing points;Randomize Lines Quads Angle- randomizes each brush samples angle while drawing lines;
Note
Drawing with pattern textures is supported only in Additive PaintMode
Use Pattern- whether to draw using pattern texture instead of solid color.Pattern Texture- reference to the pattern texture;Pattern Scale- scale of pattern texture;Pattern Angle- angle of drawing pattern texture;Pattern Offset- offset of pattern texture drawing;
-
Erase - erase layer texture using the brush, opposite for drawing;
Note
Bucket tool works in UV space
-
Bucket - tool for filling parts of the texture with selected color. Tool parameters:
Tolerance- tolerance value from 0 to 1. Tolerance means how many pixels it will cover. A bigger value means that more pixels will be filled with brush color.Can Fill Alpha- whether to fill transparent pixels of the layer;Use Pattern- whether to fill using pattern texture instead of solid color;Pattern Texture- reference to the pattern texture;Pattern Scale- scale of pattern texture;Pattern Angle- angle of drawing pattern texture;Pattern Offset- offset of pattern texture drawing;
-
Eyedropper - pick a color and set it as a brush color. Tool parameters:
Use All Active Layers- use all layers for color picking. If disabled, only an active layer will be used;Sample Alpha- whether to sample pixels alpha.
Note
BrushSampler tool works in UV space
-
BrushSampler - copies a part of the drawing area to a brush texture.
-
Clone - tool for cloning parts of the texture. Clone tool works the same way as Photoshop or any other painting software. The first click on the object will take the starting position of cloning, all follow-up clicks will clone parts of texture. Tool parameters:
Note
Clone tool works in UV space
Copy Texture On Press Down- whether to copy source texture on press down;Use All Active Layers- use all active layers for cloning. If disabled only active layer will be used.
-
Blur - tool for blurring parts of the texture. Blur implementation using a simplified Gaussian blur algorithm that works in two Shader Passes and can be configured to change blur strength. Blur tool has such parameters:
Iterations- iterations count for blurring. A higher value means strengthening the blur. It is recommended to use parameters in a range of 1 to 5. A higher value also means that the blur will use more GPU resources and the draw call count will be increased (two draw calls per iteration);BlurStrength- the strength of the blur. Zero means minimal blur, higher value - strengthen blur;DownscaleRatio- value for the number of times to downscale the texture size for blurring;Use All Active Layers- use all active layers for blurring. If disabled only the active layer will be used.
-
Gaussian Blur - tool for blurring parts of the texture. Blur implementation using Gaussian blur algorithm works in one Shader Pass and can be configured to change blur strength. Blur tool has such parameters:
Kernel size- iterations count for blurring, a higher value means strengthening the blur. Recommended to use parameters ranging from 3 to 7;Spread- the spread of blur. Zero means minimal blur, higher value - strengthen blur. Recommended to use parameters in the range from 0 to 5;Use All Active Layers- use all active layers for blurring. If disabled only the active layer will be used.
-
Grayscale - tool for layer texture discoloration. The area above the brush discolors when a user draws with the grayscale tool (saturation set to 0).
Brushes
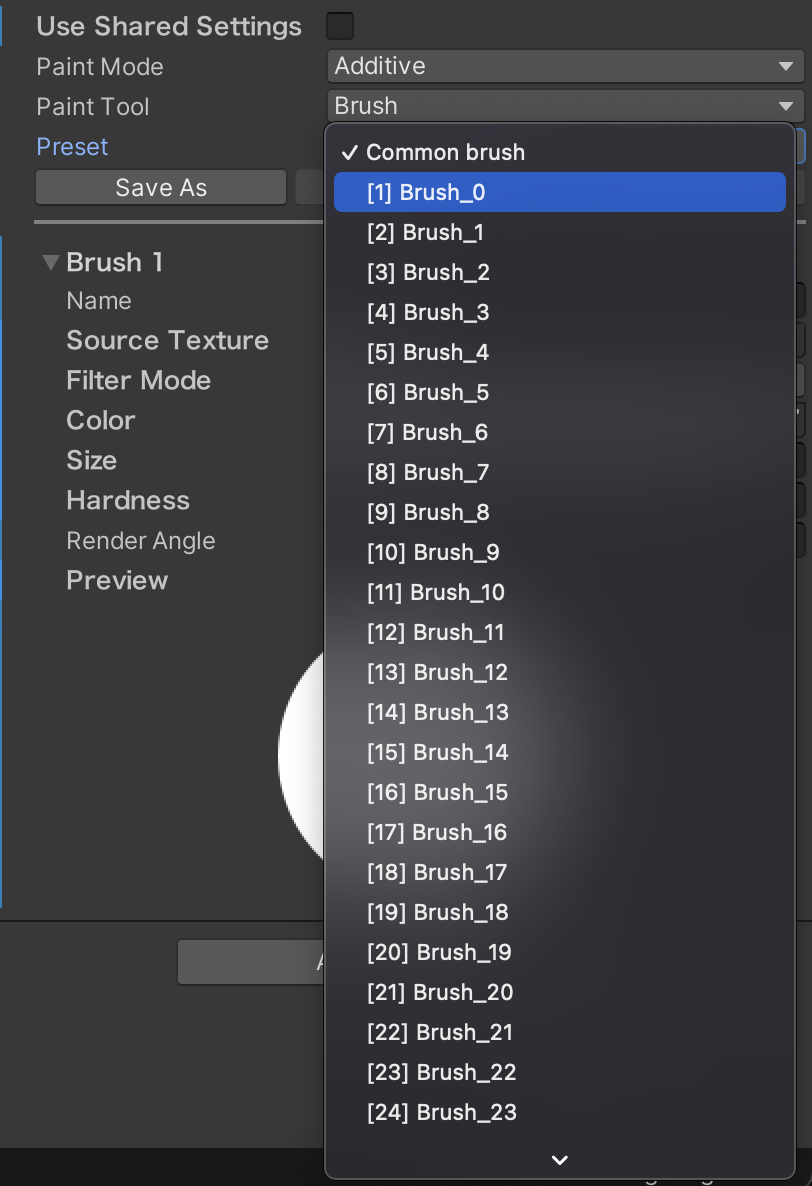
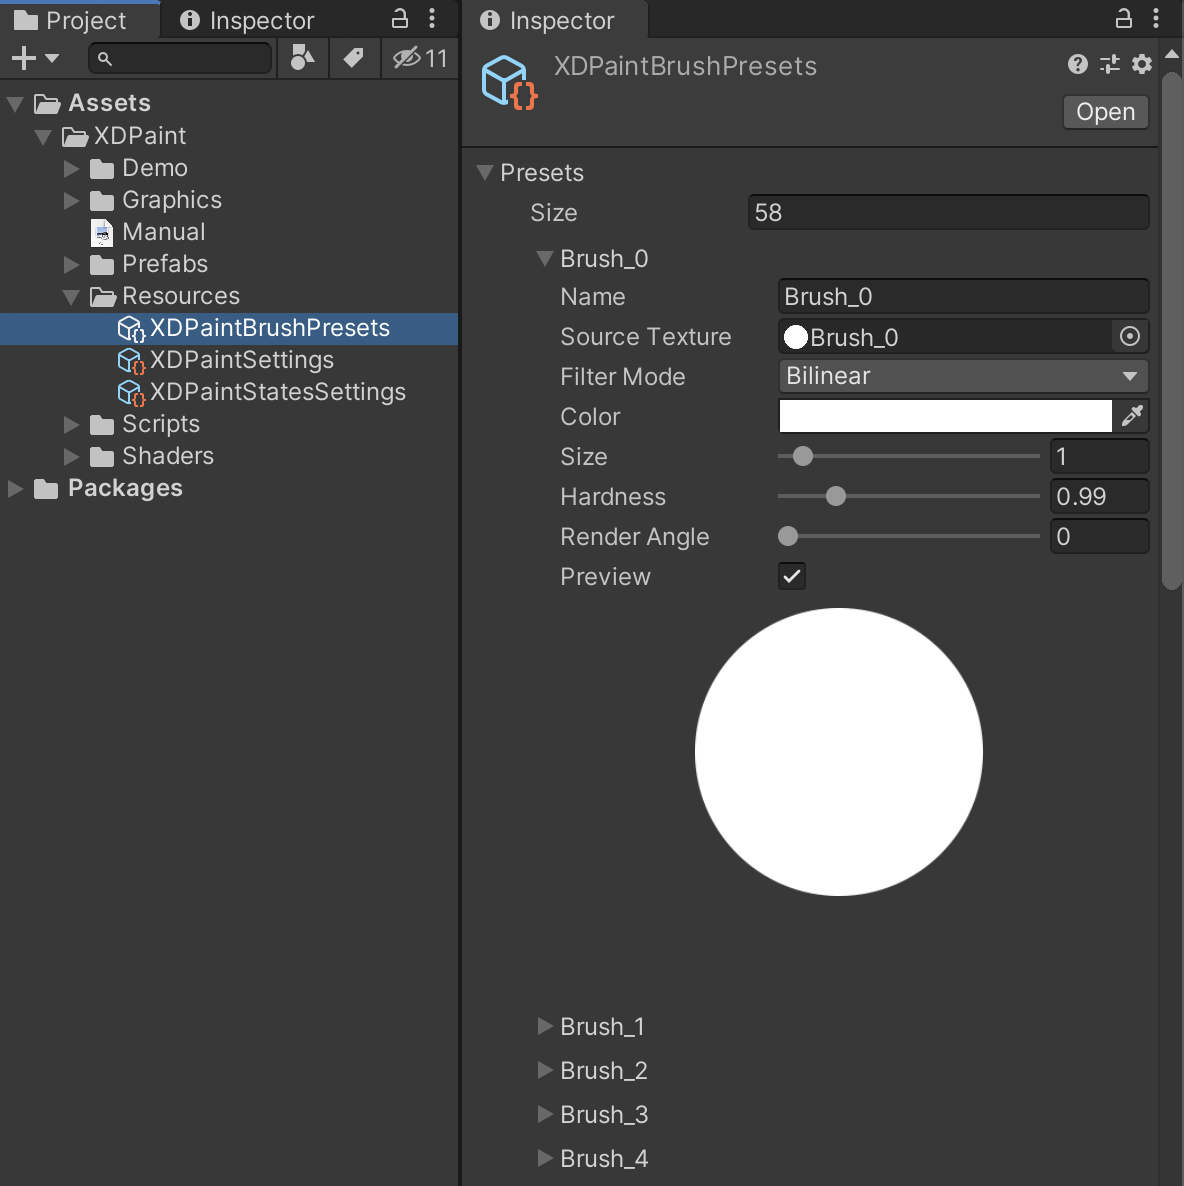
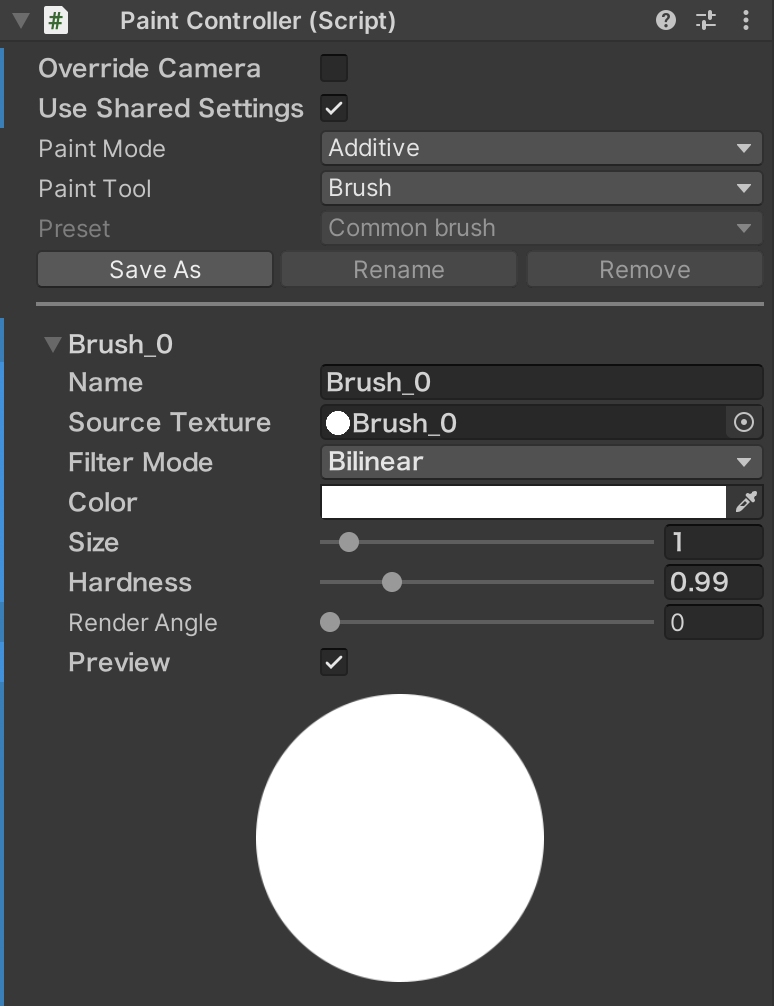
The asset has a preset system that stores brush parameters in ScriptableObject, which allows them to be reused with PaintManagers/PaintController. Presets located in the file at: Assets/XDPaint/Resources/XDPaintBrushPresets.asset. You can save brush parameters by name and apply them to other objects from the list. If you change the non-custom parameters of brush in PaintManager/PaintController inspector window, data won’t be written to Presets automatically.
Asset have built-in presets that can be reused or modified. Presets can be re-saved using PaintController/PaintManager Inspector window or changed by selecting XDPaintBrushPresets asset in Project window and editing in Inspector window.
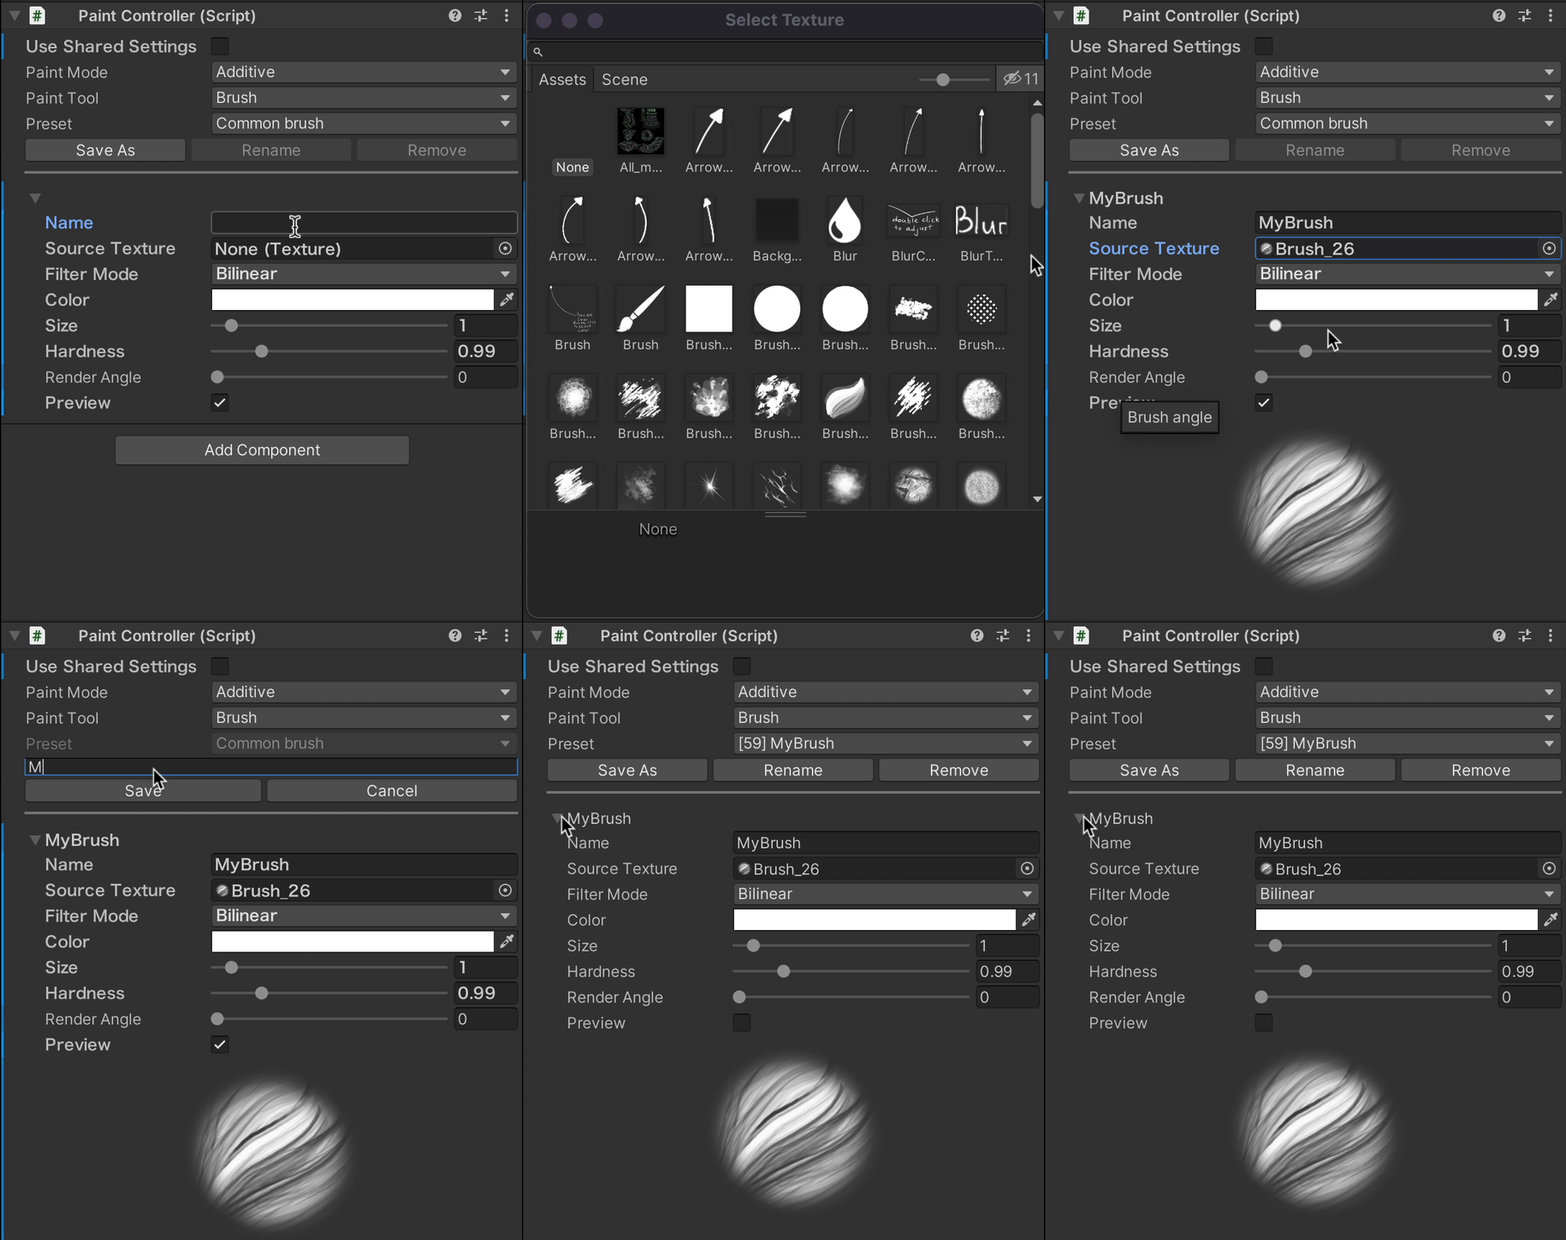
Preset can be re-saved to a new preset, for this click on Save As button.
Preset can be renamed, for this click on Rename button and choose a new name and click on Save button.
Preset can be removed, for this click on Remove button and confirm it using the dialogue box.
You can use one brush parameters for all PaintManagers, for that check Use Shared Settings in PaintController, otherwise, each PaintManager will have unique brush parameters.
Adding New Brush
To add a new brush, select [XDPaintContainer] GameObject in Hierarchy tab, then in Inspector tab set a unique brush name, select brush texture, and brush parameters, and save it as preset using Save As button. It also works the same way in PaintManager component.
A new brush will be added to Brush Presets (XDPaintBrushPresets.asset) and can be chosen in PaintController/PaintManager components.
